How to Create Standards Conversion Workflows in Cinnafilm PixelStrings
Published: June 8th 2021
How to Create Standards Conversion Workflows in Cinnafilm PixelStrings
In this educational video, Cinnafilm shows you how to create standards conversion workflows in Cinnafilm PixelStrings.
If you do not yet have your free PixelStrings account, you can sign up by clicking here.
If you are a PixelStrings OnPrem user, this workflow will be the same for you.
Watch a helpful video on how to create standards conversion workflows from Cinnafilm
We’ve crafted a video showing you how to create standards conversion workflows in Cinnafilm PixelStrings.
You can view it below, or continue on to the written tutorial.
How to Create Standards Conversion Workflows & Convert Any Potential Video Source to 59.94p Using PixelStrings
First, we’ll give our workflow a name by clicking on Workflows and then the Name tab:
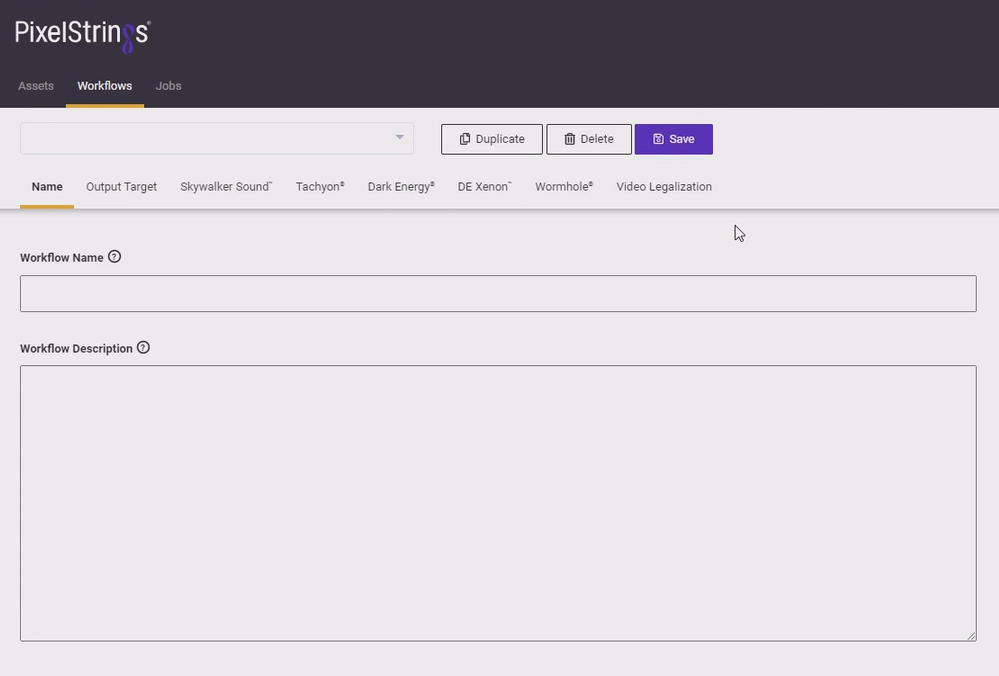
It’s good to name your workflow something meaningful to you so that you can keep track of it.
For instance, if working on a series, enter your series name, episode, and etc.
The workflow description box will allow you to enter notes for team members, or other information.
Setting the Output Target for Our PixelStrings Workflow
Next, we’ll click on Output Target.
Here, we’ll set the general requirements for our output.
We can choose our container type, desired codec, and, if we wish, make use of presets:
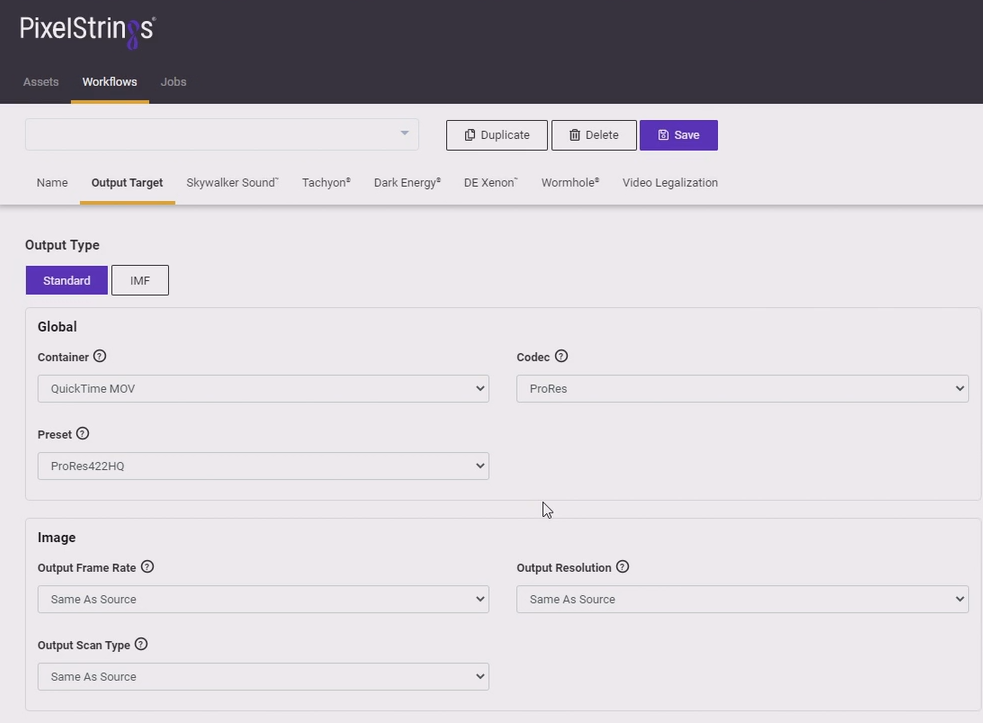
Depending on the codec we choose, we’ll see different preset types and settings available to us.
Using Source Sizing in PixelStrings
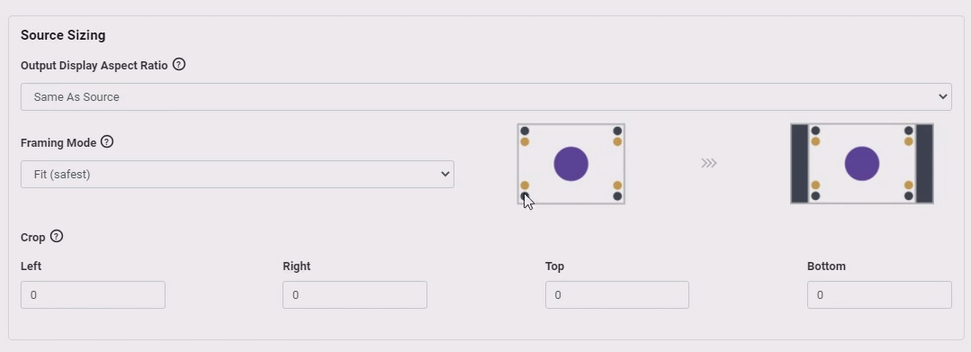
Using the Source Sizing dialog, we can maintain the same aspect ratio as our source content.
Under the Framing Mode pulldown menu, we’ll see options that allow us to fit the content, stretch, or other options.
Timecode Settings

Here we can set a starting timecode.
Captions Settings

Here we can set 3 options for our captions:
- Auto
- Pass-Through
- Drop
Setting up Cinnafilm Tachyon in PixelStrings
Cinnafilm Tachyon is the standards conversion application inside of PixelStrings.
Using Tachyon, we can drop in any format media that we wish, and Tachyon will convert it to our desired format.
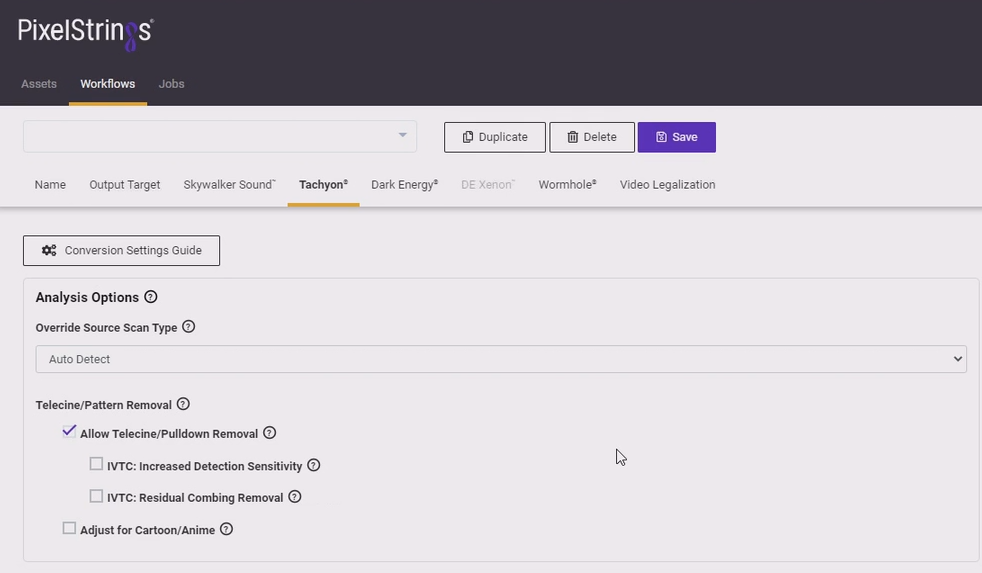
Analysis Options
Here, we will analyze our footage.
Firstly, we’ll see an option for Override Source Scan Type.
Using this option, we can drop in any format media that we wish, in order to convert the footage to our desired output previously set in the Output Target tab.
Telecine/Pattern Removal
![]()
We will enable the option here for Allow Telecine/Pulldown Removal.
If you are not certain that there are patterns in your footage, or if you know that there are patterns, we’ll enable this option.
Tachyon will decide on a scene-by-scene basis if there are any patterns to extract.
If you don’t know for certain if there are any patterns in your footage, you can enable this option without causing any issues to your output.
Motion Compensation/Frame Generation Options
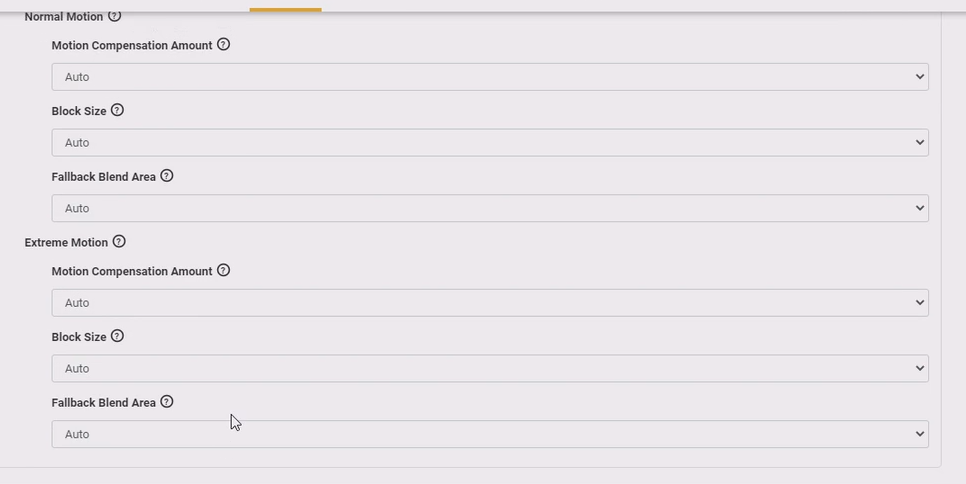
This section houses Tachyon’s phase-correlation-based motion estimator.
It’s best to leave these pulldown menus set at “Auto,” so as to ensure that you get the best possible output.
Filmic Preservation Options
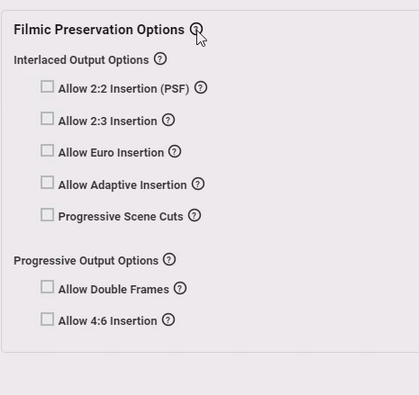
This section will help ensure that your content will keep motion blur, depth, and more.
This is important for ensuring that you retain the look of the content, which is very important to those who had originally created the content.
Video Legalization
![]()
This allows you to set modes for gamut legalization of your footage.
Generally speaking, you can leave the various options in this section set to the automatically set options found under the Legalization Presets pulldown menu.
Using these presets, your content is sure to be converted in the best format possible for your needs.
Submit Your Asset
![]()
Once you’ve finished the standards conversion workflow setup, you may click on the Assets tab to export your finished asset.
Clicking the plus symbol to the left of your job’s name will allow you to choose the final job settings that you wish to use.
You may use the pulldown menu to choose the final output for your job, or start typing to find the option you wish to use.
![]()
You may also edit your file Timestamp, Prefix, Suffix, and Workflow settings in the following dialog.
![]()
Using Test Mode to Keep Your Costs Down
![]()
Because Cinnafilm PixelStrings is a pay-as-you-go SaaS, you’ll notice that there is a Minute Base Price, as your standards conversion job will be billed by the minute.
Using Test Mode, you can bring your costs down by 50%, which is useful when you are ensuring that your output content meets your needs.
Please note you will see a watermark on your asset should you choose to use Test Mode.
Make Viewable Proxy
![]()
If you have a paid PixelStrings subscription, you can set the option for Make Viewable Proxy, which will allow you to preview your output in your browser, see how smooth it is, look for problematic areas, and more.
Completing the Workflow Selection
![]()
Once you’ve made your desired settings, you can click on Complete Workflow Selection.
Submit Job
![]()
Finally, you’ll see an overview of the total cost of your job, your output settings for your job, and the Submit Jobs button.
Click on this to submit your job, and finish your standards conversion workflow.
Conclusion – How to Create Standards Conversion Workflows in Cinnafilm PixelStrings Tutorial
We hope you found this tutorial on how to create standards conversion workflows helpful.
If you have any questions or require support on how to create standards conversion workflows, please feel free to contact us!
![]()